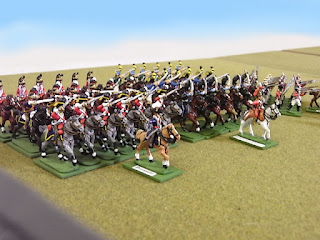
Extract from the Testimony of General Grey at his Court Martial, November 1st, 1777 :
"......I deployed our Dragoons and Colonel Winter's Grenadiers to sweep away the Colonials, with the 17th in line in support behind. The 44th made steady progress on our right to outflank the enemy via Parson's Woods.
Past experience led me to believe that once the ragged enemy saw our fellows fix bayonets, they would be off like rabbits. Unfortunately, I was so sure of this that it could be said our tactical dispositions were a little hasty, cocksure and er,...clumsy.
The British Grenadiers come under increasing pressure.
I allowed woodsmen to pour fire into our flank unopposed (routing the Dragoons), and did not extend my firing line. Our ill-trained opponents delivered accurate volleys at an unexpected rate, killing Colonel Winter and some thirty rank and file and forcing a chaotic retreat which blocked the 17th, who could not come up effectively and were also driven back.
As volley after volley are fired...
...the Grenadiers begin to fall apart, then go tow, row, rowing to the rear!
The 44th lost Colonel Halkett and retired under pressure from a fresh Continental regiment emerging from Chesterfield supported by yet another swarm of their infernal skirmishers. With regards to this unprecedented humiliation, I can only offer the defence that I was suffering from severe dental pain throughout, resulting in root canal surgery, and my attention was not on the task in hand....."
The Chesterfield Militia can feel very pleased with themselves.
As you can now guess, the second (and final) session of our Hawk River game continued in much the same vein as the first. Dave continued to press forward with the grenadiers but they came under a heavy and sustained fire from the 6th Pennsylvania and the Chesterfield Militia. This fire eventually caused them to retire leaving several dozen of their number (including Colonel Winter) on the ground.
The 17th Foot come up (even their flag is bending under the hail of fire).
It's now a hopeless situation for the 17th.
The 17th Foot came forward but they received exactly the same warm reception as the grenadiers, and once again the minutemen took the opportunity to pour a telling fire into their flank.
Meanwhile I had advanced the 9th Pennsylvania towards the 44th Foot in front of Parson’s Wood. The playing of a “quick march” option allowed me to close to effective range and get off a volley before the British could reply. This was enough to take their morale level below zero and force them to retire. With all three British units in retreat the game was declared as a “Substantial Victory” for the Americans!
The 9th Pennsylvania advance towards the 44th Foot...
...who decide they prefer the safety offered by Parson's Wood.
It certainly was a bit of a drubbing for the British who lost a total of 82 casualties including two Colonels, whilst the Americans lost a mere 22 men, and all units ended the game with good morale. Our initial thoughts after such a dramatic conclusion were that the new rule tweaks, in particular the extra effectiveness of the minutemen, had caused an imbalance in the rules.
General Grey discusses his career options with his staff.
However, on further thought I believe my victory was down largely to over-confidence on the part of General Grey resulting in poor tactical choices. This is borne out by the fact that my Americans delivered 8 full volleys during the course of the game to Dave’s 3 – such a discrepancy was almost bound to end in just this sort of result.
"Man of the match" award goes to the 6th Pennsylvania.
In mitigation, Dave really had just had root-canal surgery and may not have been on top form, and anyway we both agreed that the British were lacking in skirmishers to take on the minutemen, so I will be painting up some more “light bobs” before the next game.


