Showing posts with label 1/200th. Show all posts

Tuesday, 8 April 2014

Operation Newmarket - Conclusion

We had our final playing session of Operation Newmarket last week and wound up the game after another couple of turns. In the end we decided it was a marginal victory for the Germans although I still felt there was a chance that Dave could have won if we had played on. This is how it went:

 German tanks blocking the British line of advance through St Arnault.

Dave continued to throw his tanks forward into the heart of St Arnault but he had only Cromwells and lightly armoured Stuarts to pit against my King Tiger and its supporting Panzer IV’s. The British Churchill tanks were lumbering along in the rear, too far behind to make any impact on the action. Eventually, although they took out a Stug III and my anti-tank gun, Dave’s tanks failed to make any headway

British tanks fire their 'pea-shooters' against the side of my King Tiger - to no avail.

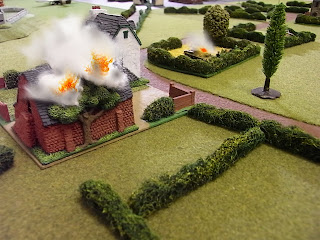
 A German Stug burns - knocked out by a Stuart tank!

Meanwhile at Orion Bridge the British paratroopers were having more success. A PIAT team crept up on the pillbox and a lucky shot flew through one of the gun slits eliminating the occupants. A further shot knocked out the German armoured car on the bridge itself leaving the east end of the structure in Allied hands.

 The para's take out my pillbox at the bridge.

Dave’s main column was making good progress along the rue St Arnault and the Commandos had by now taken the pillbox on Hill 136. It’s possible that this force still had enough clout to force its way through to one of the town centre VP locations. However at the end of play the Germans were still firmly in control of the town.

 Dave's coulmn nearing the out-skirts of the town - too late!

This game had always been intended as an exercise to try out the rules and the forces proved to be unbalanced which meant that Dave had a difficult task on his hands. The rules were originally devised by me for skirmish level games and although the armour rules work well, those for the infantry are just a bit too fiddly for a game of this size. We also felt that if the armies are to get an outing again the figures will have to be rebased in multiples – our eyes just aren’t up to the job of working out what weapons each carries!

The 1/300th armies are still under-going their refit so next we may try a stab at a 15mm ACW game.

Sunday, 26 January 2014

Operation Newmarket – turns 6-8

We finally got back in the garage this week after the festive break and resumed hostilities. I had taken advantage of the lull in the action to do some rule tweaking (mostly to the advantage of the Germans it has to be said) as one of the reasons for playing this game was to help transform the rule set from a solo system to a proper two player one.

 The British armour enters Hameau Choisy...

Following his success in knocking out the Panther, Dave’s second armoured column pushed on quickly into Hameau Choisy. Here one of my lurking Panzerfaust teams emerged from the church and succeeded in blowing the turret off a Firefly nicely blocking the road to the following tanks.

...and soon lose a Firefly to my Panzerfaust team!

Dave responded by ordering his two Stuart tanks to blast the Germans from the steps of the church whilst re-routeing his remaining tanks to the west of the village. His armour had orders to press on fast towards Saint Arnault to relieve the pressure on his beleaguered paratroopers.

Cromwell tanks bypass Hameau Choisy by moving to the west of the church.

 The Cromwells push on rapidly towards the outskirts of Saint Arnault.

Over at Ferme de la Blanc the British advance had stalled somewhat whilst Dave tried to destroy the anti-tank gun that covered his line of advance along rue St Arnault. The British infantry moved up to deal with the threat but soon came under fire from the pillbox on Hill 136. Luckily for him Dave’s Commandos were just arriving in position to the rear of the pillbox after moving up from the LZ.

"Hande hoch Fritz!"

Meanwhile in the centre of the battlefield the Shermans were trying to get to grips with two more of my Panthers. As the British armour piercing rounds satisfyingly bounced off the front of my tanks (good rules these) they in turn brewed up two of the Shermans. However Dave was rather sneakily moving his remaining Firefly around to the Panther’s rear although in the end it wasn’t this (or a rather unspectacular airstrike) that took out the tank but a lucky shot from a regular Sherman. My remaining tanks and infantry now pulled back towards Saint Arnault.

Two Sherman tanks brew up in the field whilst a third one gets off a shot...

...that finally takes out my Panther on the road.

My King Tiger moves into Saint Arnault to help bolster the defences.

 Whilst an anti-tank gun (in building 11) prepares to fire on the advancing Cromwell tanks.

Back at the bridge the paratroopers were in a tight spot pinned down in front of the pillbox and with two Tiger tanks between them and the town. The Tigers soon knocked out the airborne anti-tank guns and then started to leisurely bombard the infantry. If Dave’s tanks don’t get to them soon it may be all over for the airborne boys!

The paratroopers are losing a lot of casualties to machine gun fire from the pillbox and armoured car on the bridge.

 Meanwhile the Tigers are making short work of the British 6pdr anti-tank guns.

The situation at the end of the third session of play - turn 8.

Tuesday, 17 December 2013

Operation Newmarket – turns 4-5

At the start of turn 4 the British airborne assault finally arrived. Dave chose the area east of the River Orbec for the parachute drop whilst landing his two gliders (containing anti-tank guns and 2 sections of commandos) on the open heath on the western side of the river.

The parachute drop - figures that landed in the river or off table were given a fifty percent chance of surviving.

Our method for making the parachute drop was for Dave to release 2cm square pieces of tissue paper from a box held 5 foot above the table – one for each figure – we then placed the figures wherever the pieces of paper landed. Considering the restricted area that was chosen for the LZ surprisingly few paratroopers were lost in the river or off-table, a total of seven casualties resulted from a force of just over fifty.

The paratrooper officers and NCO's hurriedly assemble their men following the drop.

Meanwhile the British infantry and supporting armour were putting pressure on the German defenders of Ferme de la Blanc as Dave realised he would have to keep moving if he was to achieve his objective. Mortars set the barn on fire forcing the surviving German infantry to withdraw while 3 Sherman tanks, under cover of a smoke screen, rushed the Panther tank that was lurking in the field behind Hill 112. The Panther was forced to pull back rather than risk the Shermans emerging from the smoke to take a shot at its vulnerable flank.

 The British mortars are now in action whilst the infantry and tanks continue to advance.

 A direct hit on the barn by a mortar causes several German casualties.

The surviving Germans beat a hasty retreat from the farm.

As one Sherman lays down a smoke screen three others take advantage of the cover and close in on the Panther.

At the same time another column of British tanks was making its way along rue Choisy towards Hameau Choisy. This column was led by two Sherman Fireflies and as the lead tank rounded a bend in the road the radio crackled with a report (from a scouting Stuart light tank) that another Panther had been spotted at the cross roads in the middle of the hamlet. The Firefly took a quick shot on the move straight along the road and with a couple of lucky die rolls reduced the Panther to a heap of burning metal. The luck of the Brits was holding.

 The second British armour column approaches Hameau Choisy.

 The leading Firefly takes a nifty shot on the move and...

...knocks out the Panther before it can return fire.

Back at the LZ almost as soon as the paratroopers had landed a group of 3 German Tiger tanks arrived in front of Hill 167 and began engaging the paratroopers and gliders with HE and machine gun fire. Dave optimistically chose to drive his jeeps towing the anti-tank guns directly towards this threat having been told by me that he would have to “get in close” to stand a chance of taking the Tigers out. It remains to be seen whether this unorthodox tactic will work!

Tiger tanks supported by panzer grenadiers in half-tracks arrive just in time to engage the airborne troops on their landing ground.

 The only thing better than a Tiger tank (for the German player) is two Tiger tanks!

The situation at the end of turn 5 (click on the image to zoom in).

Friday, 6 December 2013

Operation Newmarket – turns 1-3

The British player’s objective in this game is to gain control of both the town of St Arnault and the bridge over the river Orbec by the end of turn 16. On the face of it this seems like quite a tall order especially as Dave isn’t familiar with either the period or the rules and all the German troops start the game concealed (no prizes for guessing who came up with the scenario!).

A Typhoon flies low over St Arnault on a reconnaissance mission but spots nothing - the Jerries must be hiding!

Despite his lack of detailed WWII knowledge Dave began the game by craftily holding back his airborne elements and keeping me guessing about where and when they would arrive. At the same time he pushed his reconnaissance group tentatively along the rue St Arnault towards the Ferme de la Blanc.

The recon section supported by three Stuart tanks move up towards the Ferme de la Blanc. 1st platoon are advancing on foot behind them.

The company heavy weapons sections are travelling in half-tracks on the road whilst the PBI move across the fields.

The recon group soon spotted the presence of a Stug III assault gun and a squad of German infantry in a field to the right of the farm. A call over the radio for artillery support was promptly answered (due to a lucky die roll) with a barrage that neutralised both threats. First blood to the Brits!

 A British artillery barrage takes out the German assault gun and half a section of infantry - good shooting!

This prompted the Germans to retaliate with everything they had which included an anti-tank gun and a Panther tank. The lead Stuart tank was quickly brewed up and a second one had a lucky escape when an AP round from the Panther bounced off it. Dave sensibly took his lightly armoured Stuarts off the road and into the safety of the dead ground behind Hill 112 while moving a group of four Shermans up to deal with the threat.

A concealed German anti-tank gun opens up on the British tanks.
 
The view from behind the German lines showing the 'brewed up' Stuart on the road.

 Here come the Shermans! The bridge looks a long way off - perhaps too far?

Meanwhile a British infantry company had been slowly moving up behind the advancing tanks on foot with their heavy weapons riding in half-tracks. The reconnaissance section and the mortars now de-bussed from their vehicles and an exchange of small arms began with some German infantry that had been spotted in the farm. Dave’s first platoon continued to move forward in support whilst his second platoon headed for Hill 112.

1st platoon head on up towards the farm whilst the Shermans go off road to avoid the enemy anti-tank gun.

 2nd platoon are nearing Hill 112 - the Stuart tanks are already there sensibly evading a Panther tank lurking in the fields beyond.

So our first session of the game ended with the completion of turn three, not bad going as we both had to get to grips with the rules. The map below shows the area of the action so far (for the full table map click here).

 Click on the image to zoom in.

All the troops, tanks and vehicles used in this game are from the superb Wargames South range of 1/200 figures (the aircraft are by Skytrex).

Sunday, 24 November 2013

Operation Newmarket

And now for something completely different – a change of scale and period to 1/200th WWII. The next game will be set ‘somewhere in Normandy 1944’ and will feature a British battle-group, supported by an airborne element, trying to capture the fictional town of Saint-Arnault and or course a vital river bridge!

A few years back I started collecting late war figures and armour from the excellent Wargames South range with the idea of playing some solo WWII games. The scale of these figures is such that they are detailed enough to be recognised individually but are still small enough to allow a large playing area to be represented on a wargame table. I also wrote my own set of rules for playing these games called ‘COMBAT!’ which we will be using to fight the game.

Operation Newmarket - area of operations (click on the image to zoom in)

In the forthcoming game I will play the defending Germans and Dave will play the British whose ground units will enter from the north side of the table with the airborne troops free to land wherever he can find a suitable space!