General view of the battlefield looking north from Devil's Den towards Cemetery Ridge on the horizon.
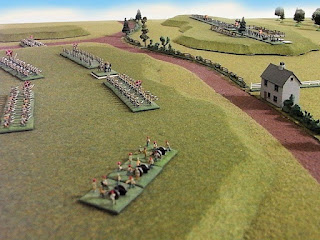
Sickles exposed line at the Peach Orchard. DeTrobiand's Brigade is in the foreground, Humphrey's Division is beyond the Peach Orchard. The white building to the left is the Sherfly House.
To win Dave needs to push Hood and McLaws forward rapidly and take as many of the VP locations on my left as possible before Union reinforcements start to arrive. Next he has to decide whether to try to take Cemetery Ridge with Anderson’s Division or bring him across to support Longstreet – the player with the most VP’s at 8.00pm (turn 16) will win if neither side breaks first!
Hood's initial deployment on the extreme right of the Confederate line.
There was very little I could do for the first couple of turns except watch nervously as Longstreet’s Corps advanced rapidly towards Birney’s strung out division on my extreme left. I attempted to close up the line but a couple of failed Command dice rolls put paid to that idea.
Hood closes in on Devil's Den and the solitary Union battery that is defending it.
The view from behind Hood's lines. The Rose House is centre left and the Wheatfield is centre right.
I was relieved however to see the advance guard of V Corps arriving on the Millerstown Road near Little Round Top and soon after them Hancock's II Corps put in an appearance on the Taneytown Road, although both had a lot of ground to cover before they could come to the aid of Sickle’s men.
Hancok leads II Corps south along the Taneytown Road - they have a long way to go to reach the scene of the action!
In the Peach Orchard my three artillery batteries were blazing away at McLaws Division as they closed up to the Sherfly House and prepared to assault. Barksdale’s Brigade in the lead were taking heavy casualties but they continued to move forward and (with a “6” rolled for morale) succeeded in assaulting and breaking the gun line. At the same moment Wofford engaged with DeTrobriand who, worn down by Rebel artillery and skirmisher fire, also broke and ran leaving the Union left wide open.
There can't be many peaches left on those trees! Barksdale (by the Sherfly House) and Wofford (foreground) engage Birney's Division who start to melt away.
Meanwhile Hood’s Division had pressed forward right up to the Wheatfield and Devil’s Den where the sole defenders were Ward’s Brigade and a battery of 12pdrs. The guns in Devil’s Den continued firing defiantly as the sea of grey closed around them but the situation was desperate despite the fact that reinforcements were now in sight.
Looking east from behind the Confederate lines. In the distance you can see Union reinforcements from V Corps deploying on to Little Round Top. Meanwhile Rebel artillery is in action in the Wheatfield.
Hood's heavy skirmish line engulfs the lone battery of 12pdrs in the "Devil's Ornamental Garden" (so called because we didn't feel that a few bits of gravel and lichen gave quite the dramatic effect we had hoped for!).
During all this excitement on the left very little was happening over on my right flank. This was because the scenario rules prevented Gibbon from firing upon Anderson unless he was directly threatened. However, this didn’t stop Anderson’s guns from pounding away at Humphrey’s Division in front of the Trostle House and soon Carr’s Brigade was added to the list of broken Union Brigades.
Anderson's Grand Battery plays on Humphrey's Division at the Trostle House (out of shot to the right) whilst Gibbon looks helplessly on from Cemetery Ridge.
So, at the end of turn 4 I have two broken infantry brigades (2 DM points) and three broken artillery batteries (1.5 DM points) giving a total demoralisation score of 3.5. Break point for my army is 5 points and if the Rebs are able to take the Peach Orchard, Wheatfield and Devil’s Den before any of my men can rally, it will be game over!


