The British are coming!
The Americans prepare to defend hearth and home.
For some reason we both managed to under-estimate the speed at which our units would move. I advanced my Militia too quickly north along the road towards Parson’s Wood where they deployed in the open rather than behind the rail fence as I had intended. Dave however made a far bigger blunder by bringing Major Dawson’s squadron of dragoons forward in column so rapidly that they ran into a hail of rifle fire from the Chesterfield Minutemen.
Don't fire 'till you see the whites of their eyes boys!
After our previous rule play-test we had decided to make Minutemen more effective by allowing them a 3,4,5,6 to hit at any range up to 15 inches but I don’t think Dave had reckoned on me also using the rail fence to “rest weapons” meaning that only a die roll of “1” would fail to score a hit! As the saddles were emptied Major Dawson ordered the survivors to dismount, but a volley from a second group of Minutemen in the South Meadow knocked down every one of them.
"It was like shootin' fish in a barrel!" - Ebenezer Howard, Chesterfield Minutemen.
In his official report to Major General Grey, Major Dawson later wrote: " We came on apace, and seeing the south meadow dotted about with various scoundrels and ragamuffins I determined that the mounted application of the sabre would put a swift end to their nonsense. However, the grenadiers to our right and a rail fence to our left inhibited easy manoeuvre, allowing those same scoundrels to pour a most galling and accurate fire into our flank, being now close upon us. This persuaded me to dismount my men after all, which was done in some confusion. Although we skirmished gamely, we were seriously outnumbered and in the space of scarcely ten minutes I found I had lost some fifteen troopers and was forced to retire ignominiously from the field with my command in ruins. "
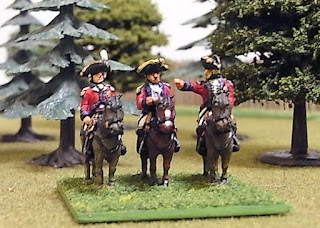
Major Dawson and the lads, just before it all went pear shaped.
While the Dragoons and Minutemen were still fighting by the South Meadow, the 6th Pennsylvania and the Militia were deploying into line to oppose the advance of the British Grenadier battalion. The British were looking confident but as the first volleys rang out it was they who came off the worst, mainly because the supporting 17th Foot were out of range, and my Americans could bring a greater number of muskets to bear. Dave then ordered the Grenadiers to “fix bayonets” prompting me to test the morale of both my units, but even the Militia passed this test of nerves!
The battle lines deploy.
The British grenadiers doing some more tow, row, rowing.
An impressive first volley from the Americans.
Meanwhile Dave had been steadily marching the 44th Foot through Parson’s Wood in an attempt to out-flank my line. This was made possible because the 44th were in possession of several “quick march” command options (diced for at the start of the game before deployment) enabling a relatively fast progress through the undergrowth.
The 44th Foot emerge from Parson's Wood.
Finally, Colonel Halkett emerged from the forest at the head of his regiment and his light company began skirmishing with my Minutemen. It was at this point that Captain Smallwood, in charge of my section of artillery (placed on the high ground behind Hawk River) fired off their first ranging shots. The balls bounded across the field taking out two men in the column and parting the poor Colonel permanently from his horse!
Just before the lucky shot.
The 9th Pennsylvania prepare to shore up the American left flank.
A very entertaining first session (well, for me at least), however I fear I may not do so well next time as the British infantry are looking more than a little annoyed and no doubt intend to get to grips with the bayonet soon.


