The view from behind Jackson's lines looking west towards
Heintzelman's position in front of Sharpeville.
For me it was the horrible realisation that Longstreet’s Corps was not off-table (as I had hoped) but was fully assembled east of Hawk Ridge. I had completely failed to detect its presence in the run up to the battle. For Dave it was the sight of my Artillery Reserve (4 rifled batteries) already deployed in range and ready to start bombarding Ewell’s battle-line.

Part of Longstreet's Corps (Anderson and Kemper) drawn up in column on
Jackson's flank. The Barnes Farm is just visible on the skyline.

The Union Artillery Reserve were already in range of Jackson's lines at the
start of play. They caused some serious damage to Ewell's Division
(the dice are there to record ammunition usage).
The game got off to quick start because I had already issued orders to Heintzelman’s Corps to advance and engage Jackson’s forces near the Barnes Farm. This area was the “contact” terrain square in the campaign game and, as were aware of each others presence, we were able to start play with orders already issued to our troops.

Kearny's Division of Heintzelman's Corps start to advance
through the fields of the Barnes Farm.

The view along Jackson's line at the start of play
(Ewell on the left and A P Hill on the right).
I think Dave was a bit surprised by my sudden advance and this reinforced his paranoia that Porter’s off-table Corps was about to fall on his right flank. This gave me a slight psychological advantage that I played to throughout the evening although it didn’t change the fact I was starting the game with 12 Brigades against 24!

Part of A P Hill's Division was angled back to protect against any
flanking movement. Robertson's Troopers were also present
as was the great JEB Stuart himself (foreground).
The presence of my Artillery Reserve (deployed south-east of Sharpeville) helped to make up for my lack of numbers as the two battle-lines engaged. The guns could not fire using our “Grand Battery” rule because my artillery commander was off-table with the supply train (in our rules only guns firing under the direct command of the artillery commander may fire in “Grand Battery” forcing morale throws for units hit) but they still managed to lay down an effective fire on the Confederate front line.

The Union Supply Train arrives in Sharpeville - no ammunition can
be distributed until a Wagon Park has been established.
The fighting around the Barnes Farm was intense right from the start with both sides taking heavy casualties. On one occasion A P Hill himself was seen on the Rebel front-line steadying the men (it’s unusual to see Confederate Generals in such a forward position!) while Fighting Joe Hooker was doing the same on the Union side. Hooker risked himself once too often and was carried from the field wounded (quite a loss as he was “A” rated in this campaign!).

Hentzelman's battle-line at the Barnes Farm
(Kearny on the left, Hooker on the right).

Hooker on the firing-line (the card counter under his command base notes
the current order mode of the Division - in this case "ENGAGE").
Meanwhile, a mile or so to the south, McDowell was starting to deploy his Corps on the right flank of Heintzelman. This was fortunate because it put his command square in the path of Longstreet’s advancing Corps. McDowell was also about to be joined by Tompkin’s Cavalry Brigade who had ridden across the field to lend their support.

McDowell's Corps leaving Sharpeville on their way towards Hawk Ridge.

Longstreet's Corps begin their advance past the Fisher Farm.
So, at the end of the 12.30pm turn we still have plenty of action around the Barnes Farm and a new fight brewing near Hawk Ridge. All the Rebel forces are on table (except for Fitzhugh Lee’s Cavalry) and, although another Union Corps is arriving at Sharpeville, three other Union Division are still off-table – could Porter be about to fall on Jackson’s flank? Dave doesn’t know for sure but of course I do and so do you if you’ve been following our campaign diary blogs Road to Appomattox and Wilderness Tavern.
We hope to continue play next week
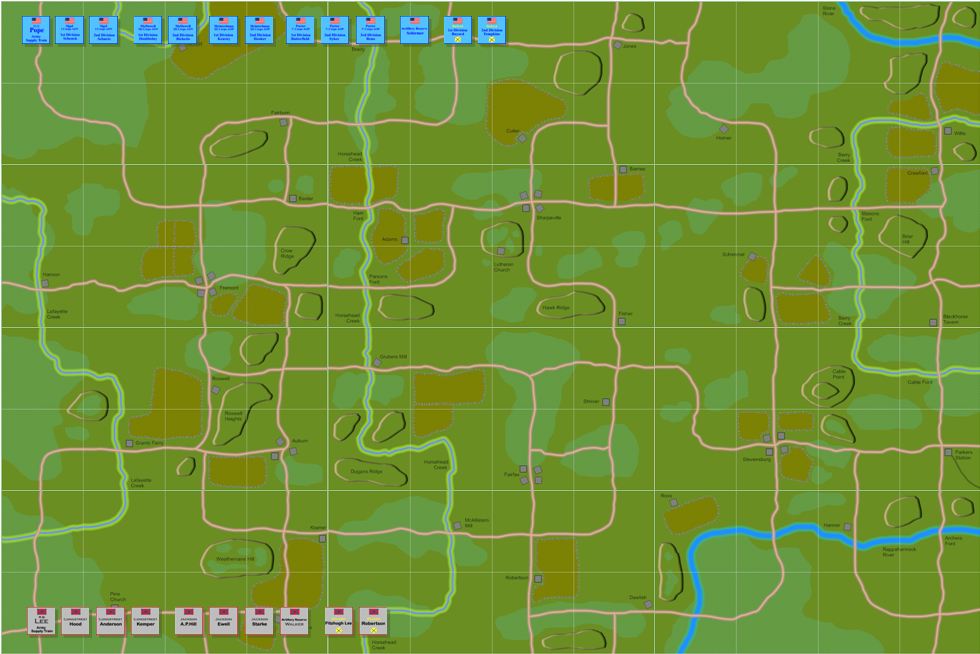
To view the battlefield map click here.