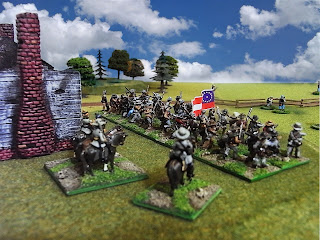
"There stands Jackson - like a 15mm stone wall!" General Jackson with the 2nd Virginia at Henry House.
Sherman's H.Q. behind Buck Hill.
We started the game with our front lines fully deployed and within artillery range of each other so there was little scope for any clever manoeuvring. I had no choice but to push Sherman’s brigade forward as quickly as possible to try and eject the Confederates from Henry Hill before their reinforcements could arrive. Franklin meanwhile was ordered forward in field column on my extreme right to come up behind the 79th New York.
The 1st US artillery move forward past the Stone House on the Sudley-Manassas Road. I first painted this Hovels model in a lovely grey and then discovered it should be a sandstone colour - grrrr!
Franklin's brigade looks quite impressive but the 11th Mass (centre) have proved to be pretty unreliable.
All movement relies on Command Point usage and the number of CP’s allocated to each unit varies every turn on a die roll modified by the unit leader rating. This inevitably meant that some of my regiments moved faster than others and any attempt to keep the lines dressed soon had to be abandoned. This was especially true of Franklin’s command where the 11th Massachusetts lagged behind the rest of the brigade having failed to move at all on turn 1.
Sherman's brigade moves forward - more or less keeping in line.
Imboden's battery on Henry Hill engaging in some effective counter-battery fire against the 3rd US artillery. In the distance the skirmishers of both sides are hotly engaged.
The 3rd US artillery on Buck Hill - the casualty figures denotes that the battery is disordered.
To add to my problems my flanking regiments soon had to cross Young’s Branch and both became disordered as they waded through the stream. This made movement even slower as disordered units must expend extra CP’s to manoeuvre. However, the Rebels were having a few problems too – not with movement but with some jittery trigger fingers in the ranks of the 4th Virginia who fired off 3 volleys whilst well out of range!
The 79th New York get their feet wet in Young's Branch.
Somehow, following a round of artillery fire, the 2nd Virginia managed to raise their morale level to 'Defiant' - perhaps it was the influence of the great man himself?
Early (living up to his name) emerges from the woods onto Bald Hill.
On turn 3 Dave was allowed to test to see if Early’s brigade had arrived. He needed a 5 or 6 to bring them on so I was hopeful he wouldn’t manage it - no such luck (he rolled a 5). With Early’s men now in position on Bald Hill I think we will be in for an interesting session next time that we play!
The situation at the end of turn 3 (1.30 pm) - click the image to zoom in.


Beautiful pics as always, really immersive!
ReplyDeleteThanks Phil !
DeleteGreat report and accompanying photos. Plus the derelict house in the 1st picture is and excellent mode l(scratch built maybe).
ReplyDeleteThanks Jay - the model is actually a resin one by Hovels painted for me by a while back by the talented Matt Golding.
Delete